Sunday, April 22, 2012

Baked Risotto

With a new born around the house it has been hard to make the same foods we ate before I was pregnant. One dish we love is risotto, and anyone who knows about risotto it is very time consuming. You are chained to the stove stirring rice for a good 45 minutes and having a newborn does not allow me much free time.


I saw a recipe for baked risotto on a cooking channel so I began to look at different recipes and started to make my own combination.


Ingredients
1 ½ cup arbor rice (I make a lot because we love it for left ovens)
Olive oil
Tablespoon garlic
Tablespoon heavy cream
1 cup white wine
5 cups chicken broth
Parmesan cheese for garnish
Asparagus, peas or anything else you would like to add (shrimp, pancetta etc.)


I prefer to roast my asparagus before hand. I feel it gives the veggie a deeper flavor. I cut the asparagus in thirds and on a cookie sheet sprinkle olive oil, salt and pepper. I place the cookie sheet in a 350 degree oven for 15 min. After the first 15 min. I take the asparagus out and re-toss to make sure everything is properly coated and place it in the oven for another 15 min. Once done I set aside.


You will need a Dutch oven to prepare the risotto. I don’t know exact measurements so bare with me. Drizzle approx 2 tablespoons of olive oil in the bottom of the Dutch oven, add garlic and rice to toast. The rice does not take long to toast, approx 2-3 minutes. Feel free to also add onion, currently I am trying to limit onion and garlic in my diet because I am breastfeeding.


Once the rice is toasted add white wine and stir. While you are toasting the rice in a separate pot start to warm up the two cups of chicken stock and reverse the other three cups. Once chicken stock is at a slight simmer pour into Dutch oven, give a quick stir before placing into the oven.


Place Dutch oven in preheated oven for 425 degrees. Let cook for 10 minutes, take risotto out and stir if needed add ½ cup of the remaining chicken stock. Place back in the oven for 10-15 minutes. Take risotto out and add remaining chicken stock, heavy cream and parmesan cheese. Add more chicken stock if you like your risotto a bit more moist. Then, add asparagus or whatever veggie or protein you prefer.


The finished product in.


The bowl for my husband. He likes alot of cheese.

Wednesday, April 11, 2012

Sugar Coated Pecans

I enjoy all types of nuts but when I was pregnant, I cut them completely out of my diet. I had been reading some articles about how eating nuts while pregnant could cause your child to have a nut allergy. Well of course, I freaked out and cleared the entire house of all nut products. It wasn’t until my third trimester I felt comfortable enough to eat peanut butter toast.


Since I am no longer pregnant, I have been on the hunt to find as many recipes as I can that include nuts. One of my favorite things to eat are the roasted pecans that are covered in sugar that they sell in carts around the monuments here in DC.


The nuts actually help to satisfy my sweet craving so I am not eating cookies and cake. I also add a bit more salt then you see with the recipes on the internet this allows you to have the salty sweet taste. I can’t wait to try this recipe with some almonds. I used pecans this time around because I love the buttery taste of them and the sugar just made them that much better.


Recipe
1 egg white
1 tablespoon water
1 pound any variety of nut ( I used pecans)
1 cup white sugar
2 teaspoon salt (I like the salty sweet taste. You may want to add less if you want a sweeter taste)
1/2 teaspoon ground cinnamon


Preheat the oven to 250 degrees


With a whisk mix together egg white and water until combined. The mixture will have a froth to it. In a separate bowl, mix together the sugar, salt and cinnamon.


Add the nuts to the egg white mixture and stir to coat the nuts. Once the nuts are covered evenly with the egg white mixture add to the bowl with sugar. Mix until the nuts are coated.


Once nuts are covered with the sugar mixture spread nuts onto a parchment lined baking sheet. Bake the nuts at 250 for about an hour. Stir the nuts every 15 minutes, make sure you keep an eye on the nuts. If you have ever burned nuts you will know it is the most awful smell that takes forever to leave the house.


This picture shows the nuts after their egg bath and coated in the sugar mixture.


This is not the best picture but the nuts after ther are done roasting. I have already made two more batches!!!! Enjoy

Sunday, April 8, 2012

Homemade Cheez-its

My husband and I are both trying to lose that baby weight we gained (only 10 pounds to go). In an effort to support my husband I have stopped buying snack foods, including cheez its, which are my husband’s favorite late night snack. I personally don’t like them I find them too greasy but whatever makes him happy.

My new favorite obsession is pinterest. You can find ideas for dinner, desert and multiple crafts. I can’t wait to try some of the awesome things I found. So the first thing I had to try was a recipe for homemade cheez its. The first batch I followed the recipe to the letter and found the dough was too crumbly and the cheese flavor a bit too mild. Therefore, I altered the amount of cheese and milk added. I do have to say this is now one of my husband’s favorite and I have already made two other batches with different types of cheese (cheddar and pepper jack). I am sure these will also be a family favorite in your house as well.

Recipe
2 ½ cups of cheese (cheddar, pepper jack, parmesan etc.)
¾ cup flour, you will need more for dusting and rolling out dough
4 tablespoons of salted butter cut into pieces
½ teaspoon salt and pepper
3 table spoons milk (this was perfect for the cheddar I would probably do 2 tbl for the pepper jack )
Preheat the oven to 350 degrees

In a mixer, combine the cheese, butter flour salt and pepper. Mix until the butter is the size of peas and the mixture is course. Add the milk and mix until the dough forms a ball.


On a lightly floured surface, with a rolling pin roll the dough into a rectangle about 1/16 inches. An easy way to accomplish this is to place the dough in between two rulers and once the rolling pin hits the ruler, the dough is perfect. I used a pastry cutter to cut out the cheez its. I eyeballed the size of the cheez its. The recipe says 1x1 inch but I was running into feeding time and wanted to get them into the oven before I had to feed the baby.


Once the cheez its are cut place them on a parchment-lined baking sheet. Use a chop stick or anything with a dull end poke a hole in the middle of the cheez it. You can sprinkle with sea salt but I opted out because I used salted butter and the cheese is also salty.


Bake in the oven for 15 minutes, or until the ends are browned. Remove from the oven and let cool. These will not stay in your house for long so make sure you get to eat some before they are gone.


Wednesday, April 4, 2012

Baby O is here

There have been many changes in the past couple of months. The biggest would have to be the birth of my daughter “Baby O”. She is the light of my life. I am lucky enough to have the next six months to spend with her. I already want to stop the clock because she is growing up too fast.


The good news is now that I am home for the next six months I have started to cook, clean, organize and do some projects around the house that I am very excited to start sharing with everyone again. Thank you for anyone who is still reading my blog I know it has been awhile but I promise to start updating on a regular basis.


Tuesday, August 30, 2011

I'm Back

Hi Everyone. I know it was has been a super super long time since I wrote, but I have a good excuse. My wonderful husband and I are expecting our first baby!!!! I am overjoyed and excited for this new chapter in our lives. I am done with my first trimester, and am finally able to eat without feeling sick and getting some of my energy back.


I don’t have the energy that I used to but I am starting to feel a little better. I have been able to stay up past 8 and have started to cook dinner again. I have not been cooking as much as I am used to but I have been doing many different crafts in bed. So, sorry but the next couple of posts are going to holiday crafts. I am super excited that this will be the first Thanksgiving and Christmas in our house. We ALWAYS travel to either NY or PA to celebrate the holidays with our families. While I love my family and I am going to miss them over the holidays there is something to be said about being able to stay home and be in your own house. I am excited to get a tree and hang up lights I cant wait.


The baby we dont know if it is a girl or boy but cant wait to find out.

Monday, July 25, 2011

It Has Been So Long

I am so sorry. It has been a crazy month. Work has been keeping me very,very busy but I have some great stuff coming. Again so sorry, but keep coming back I have some awesome stuff.

Monday, July 4, 2011

Shrimp and Grits

I have some wonderful co-workers on my current project. I feel like I have made some great friends and I am very grateful to have met them and having them in my life. My one friend is from the South and brought me a cookbook from her local town where she is originally from. I love southern cooking and wanted to try a traditional southern meal. Therefore, I made shrimp and grits.

My husband and I feel in love. It was so good. It is a very heavy meal calling for bacon and cheese but it was very worth it. I will admit the pictures do not make it look very appetizing but it was DELISH. I only have orange cheddar cheese so that is one reason why you will notice the grits to have a orange tint to them. But it was still delish. I am not going to post the recipe right now because I have some changes to it that I need to test before I post the changed recipe.

The grits, again I used orange cheese. My mistake but still is delish

The finished product. Loved it will be making it again very soon.

Second post for Pink Champagne Cake


So this is the 2nd part of the pink champagne cake post. It is a white cake recipe and added champagne to the batter to make it a “pink champagne cake” . One secret that I always do with my cakes is to slightly under bake them. It is so hard to make a cake from scratch that is both moist and not dry. You have to be so careful not to over mix the batter or to over bake. Baking cakes from scratch have been one of those things for me that I just can’t seem to completely master. This is either my third or fourth cake I have made from scratch and I still don’t have it down perfect.


As well as under baking the cake I try to under mix the batter. I keep an eye on the mixture and once I think it might be a minute or two of mixing left I take it off the kitchen-aid and pour it into my pans. I also do not use anything on my pans; I don’t add flour, butter or pam. I make sure that pans are non-stick and just keep my fingers crossed the cake does not stick.

Ingredients
18 tablespoons (2 sticks plus 2 tablespoons) unsalted butter, room temperature, plus more for pans
4 1/2 cups cake flour (not self-rising) I have used regular flour as well and it turns out fine
1 1/2 cups whole milk
1 ½ cups Champagne
9 large egg whites, lightly beaten
1 tablespoon pure vanilla extract
2 tablespoons baking powder
1 1/2 teaspoons salt
2 1/4 cups sugar


** The batter will be runny but it cooks really well. Just be aware that it will be somewhat runny.


Directions
Preheat oven to 350 degrees.


In a medium bowl, stir together, milk, egg whites, champagne and extracts. Into a second medium bowl, sift together the flour, baking powder, and salt; set aside.


In the bowl of an electric mixer fitted with the paddle attachment, beat the butter on medium speed for 30 seconds. With machine running, gradually add the sugar. Continue beating until light and fluffy, about 2 minutes. Scrape down sides of bowl as necessary.


Add one-third of the flour mixture and one-third of the milk mixture, and beat on low speed until just incorporated. Add remaining flour and milk mixtures in 2 separate batches beating between additions to fully incorporate. Scrape down sides of bowl, and stir by hand to finish.
Divide batter evenly between prepared pans. Smooth surface with a rubber spatula. I under bake my cakes, but if you want to completely bake it make sure a cake tester comes out clean when inserted.


Let cakes cool in pans on wire racks for 5 minutes. Run a small metal spatula around the sides of the pan, and invert cakes onto greased racks. Reinvert cakes onto cooling rack. Let cool completely before filling.


The cake when it first came out of the oven. You can see from the cake it is a light color like I said I under cook my cakes.


The second cake. Again you can see from the color I underbake the cake.


The cakes on on top of the other.


The finised product. So delish. Please try to mkae your own cake and let me know of any secerts you may have.

Sunday, June 26, 2011

I was going to a pool party last weekend and I wanted to find something fun to make for the party. So I went to all the cookbooks I received from my grandfather in law and I found these awesome instructions on how to make a watermelon bowl. I also bought some blueberries and strawberries to go into the bowl because I thought those would be the perfect summer fruit. After I warned, my husband to have the phone ready in case I cut my finger off I embarked on starting to cute my watermelon.


The first thing that I wanted to do was to make sure that the watermelon I selected had a flat bottom. This will allow the watermelon once it cut to sit on the table without it rolling off.

I then took a pen and tried to sketch the outline that I wanted to cut out. One thing that I found out from trying to make the watermelon bowl was I could not stay in the lines. No matter how hard I tried, I was not able to cut on the lines I drew on the watermelon.


Once I had the outline cut out, I made sure that I cut a HUGE “X” in the top of the watermelon. It is very important to cut the “x” on top so that when you are pulling the watermelon apart it does not break into a million different pieces.


Once the top is removed I used an ice cream scoop and proceeded to scoop out all the inside of the watermelon. I made sure to put all the insides of the watermelon in a separate bowl to ensure that I saved it and put it in the bowl with the rest of the fruit.


The outline I drew on the watermelon and me trying to cut within the lines.


The "X" on the top of the watermelon, this will help will seperateing the watermelon.


Once the watermelon top is removed, loos so good.


The bowl complete with the watermelon, strawberries and blueberries in it.


A top view of the watermelon bowl. It looks delish, and was a bit hit at the pool party.

Herb Box

I went home a couple of weeks ago for my cousin’s graduation party. The party was on Saturday so I was able to spend all of Sunday with my family. My mother and I have very similar personalities; we have a hard time sitting still and need to be always doing something. So we thought of a project to do together. I don’t have a lot or room in my backyard and we don’t have any grass. It is something my husband and I are planning on putting in grass one day.

We decided to make herb boxes for my backyard. I wish I could give some dimensions and some better information on how to make these, but my mother and I came up with the idea and my father did the execution of it.

Here are some pictures of what the boxes look like. Like I said sorry that, the instructions are not better but it is a great idea to try to make.


Top view of the box.

This is a picture of the basil and parsley.


This is the second box, you can see the chives and rosemary.

Tuesday, June 21, 2011

Chicken and Broccoli White Pizza

As I posted in a different blog, my husband and I love pizza, so I began to make my own pizza crust. The best part is the dough freezes and still comes out great. There have been nights when I have forgotten to take out chicken or something else for dinner. So, as soon as I get home I take the dough out of the freezer and by the time we change out of our work clothes, walk the dog, get the mail etc the dough is completely defrosted and we are ready to sit down and eat dinner.

I was away for a weekend visiting family and my hubby was home alone. So, by the time I got home there was no time to grocery shop and get everything done so we had no food in the house for almost a week. We finally had time to get the store and I hate to admit it but I bought a rotisserie chicken. I usually like to roast my own chicken but I just did not have the time.
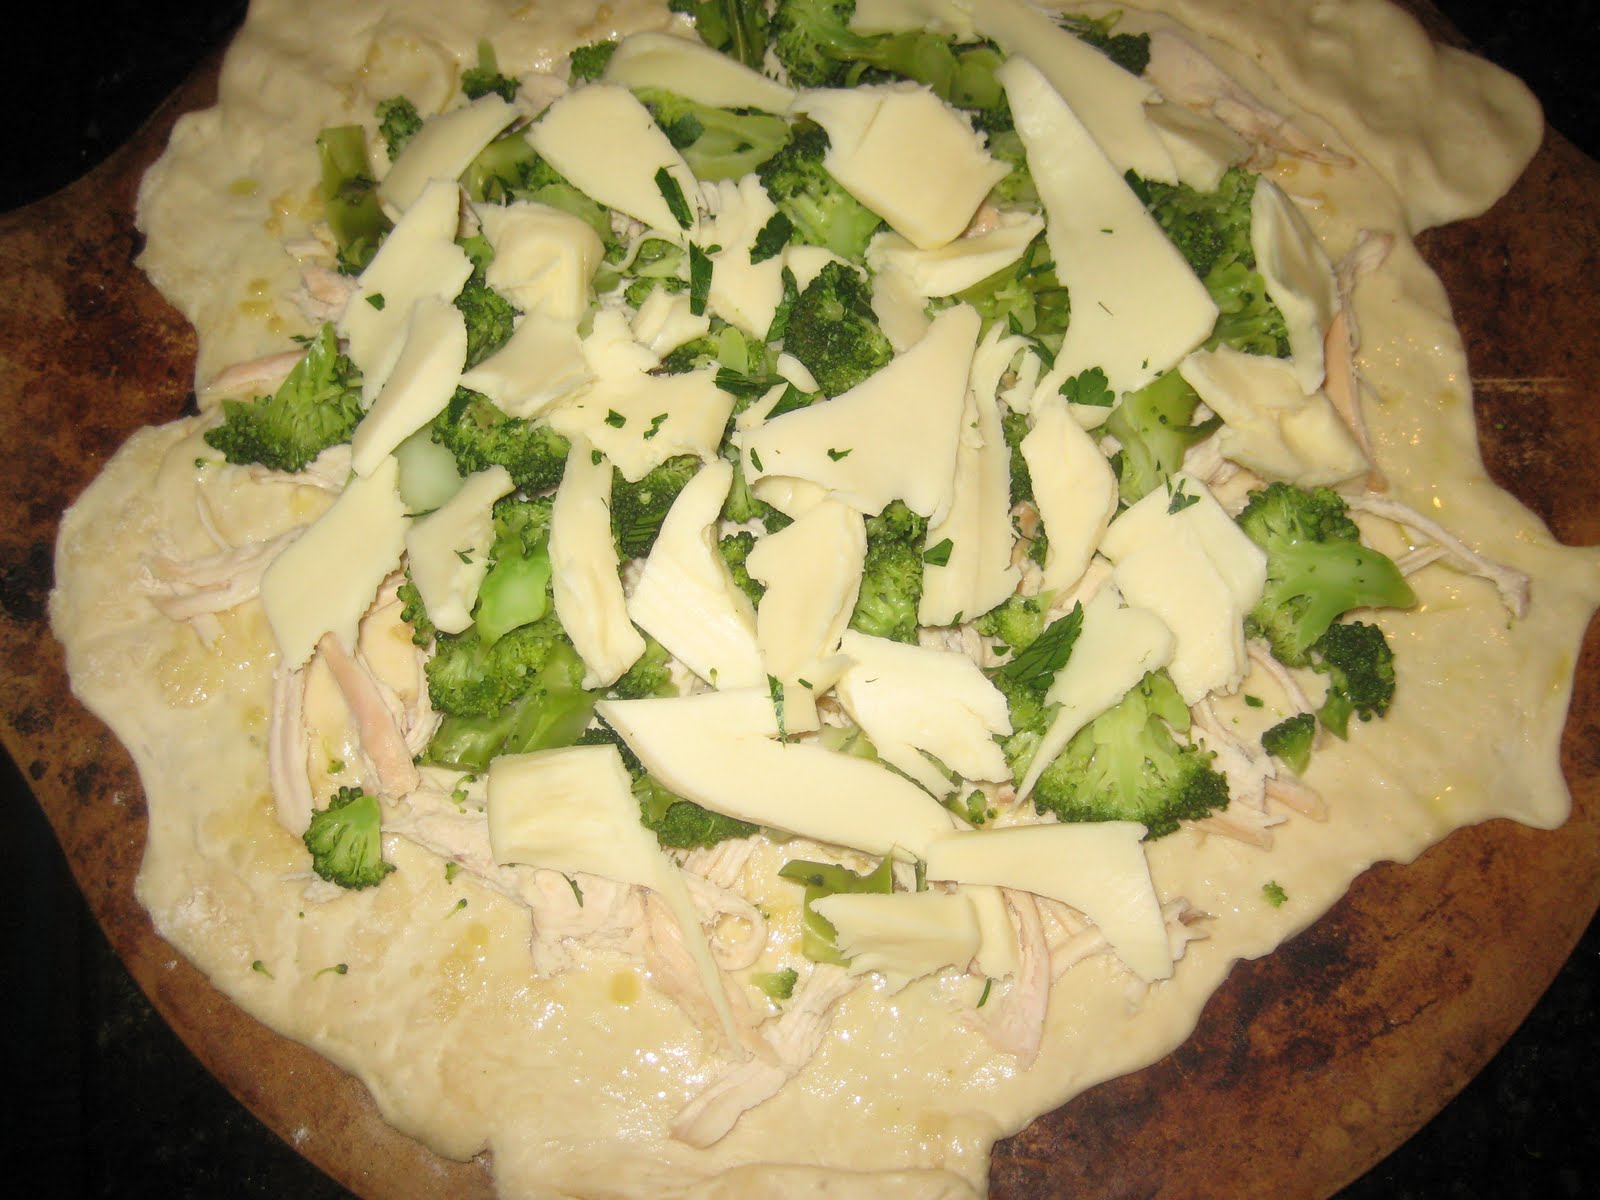
So, this was a white pizza with roast chicken and broccoli. I just used a little bit of oil and garlic on the dough and layered chicken, broccoli and some mozzarella on top. Popped it in the oven for 30 min at 350. It is quick and easy with little to no clean up.

I love this pizza dough recipe and it has made a weekly appearance in my house, whenever we don’t know what to make we always go to this.

The pizza before going into the oven.

The pizza once out of the oven. How great does that look.


Sunday, June 19, 2011

Pink Champagne Cake

I was going to a pool party this weekend at a friend’s house. I wanted to make sure that I brought something to the party that I knew people would eat and really enjoy. So I decided to make pink champagne cake. I made a white cake and added about 1-1 ½ cups champagne. I will post the white cake recipe in another blog.

I also made a cream cheese frosting with champagne in it to give it a little extra zing. It was delish, the frosting took some getting used to but I would make this cake again. I think it would be great as a wedding shower or engagement party cake. I am going to try and work on the frosting a bit and see if I can get it a little thicker and make designs in a pastry bag.

I will give a little more instruction in the blog about the white cake. This blog is manly to see the finished product.

The first layer of cake with the frosting on it.

After I placed the 2nd layer on top.

The finished product. So delish, kind of making my mouth water a little bit.

Pasta and Pesto

I love pesto you can eat it hot or cold. You can also eat it over noodles, chicken or fish. I made a huge batch of it last week because I knew that I was going to bring some into work and I wanted to make sure there was enough for my husband and I to eat.

This is a classic pesto recipe, and I used the fresh basil from the herb boxes my mother and I built. That is for a later post. I also use pine nuts. This was easy and came out delish I also added some shrimp because my husband wanted something with a little more “substance”. The best pat was I made my own pasta so it made this dish even more delish.

Try it and let me know what you think.

Ingredients
1/2 cup pine nuts or walnuts
4 cups loosely packed fresh basil or parsley leaves
1/2 cup finely grated Parmesan cheese
1 clove garlic
Salt and pepper
1/2 cup extra-virgin olive oil

Directions
Preheat oven to 350 degrees. Spread nuts on a rimmed baking sheet; toast in oven until golden and fragrant, tossing occasionally, 5 to 8 minutes. Let cool completely.

In a food processor, combine toasted nuts, basil, Parmesan, and garlic; season with salt and pepper. Process until finely chopped. With machine running, pour olive oil in a steady stream
through the feed tube; process until smooth.


Heating up the pesto sauce in the pan.

Adding some shrimp per my husbands' request.


Old Fashion Apple Pie

So the last post I showed you how I made pie crust, now I am going to show you what I did with that pie crust. I love apples they are my favorite fruit, but I hate apple pie. Go figure!! My husband on the other hand loves apple pie, so I had some extra time a couple of weeks ago and decided to make some pie.

I did change this recipe a little. I used a variety of different apples to allow for a deeper flavor. I wanted to give the pie an intense apple flavor so I thought this would be the best way to do that. I also took the lemon out of the recipe. I thought that I took away from the apple flavor, feel free to add it back in if that is what you are like.

Ingredients
2 tablespoons all-purpose flour, plus more for dusting
12 variety of apples
3/4 cup sugar, plus additional for pie top
1 1/2 teaspoons cinnamon
1/2 teaspoon nutmeg
Pinch ground cloves
2 tablespoons unsalted butter
1 large egg, beaten

Directions
Heat oven to 375 degrees. On a lightly floured surface, roll out pie dough into two 1/8-inch-thick circles to a diameter slightly larger than that of an 11-inch plate. Press one pastry circle into the pie plate. Place the other circle on waxed paper, and cover with plastic wrap. Chill all pastry until firm, about 30 minutes.

In a large bowl, combine apples, sugar, lemon zest and juice, spices, and flour. Toss well. Spoon apples into pie pan. Dot with butter, and cover with remaining pastry circle. Cut several steam vents across top. Seal by crimping edges as desired. Brush with beaten egg, and sprinkle with additional sugar.

Bake until crust is brown and juices are bubbling, about 1 hour. Let cool on wire rack before serving.


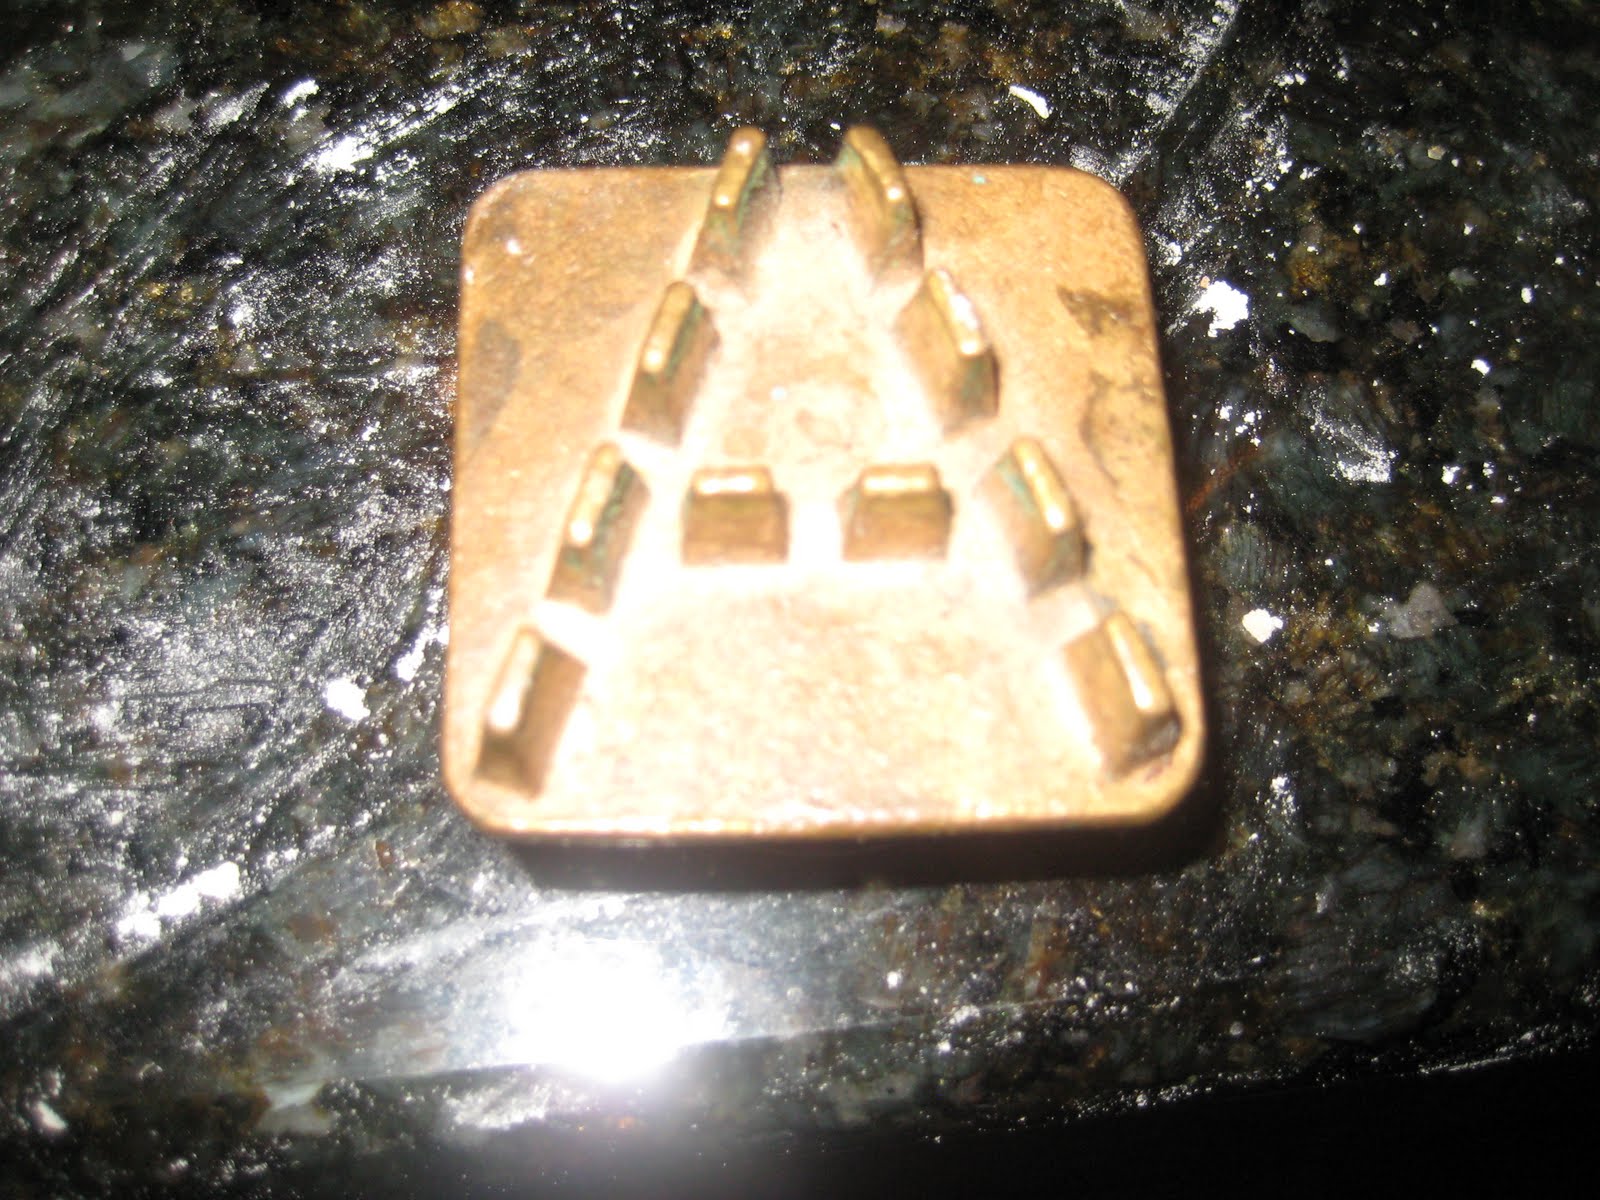
These are awsome stamps I recieved from my grandfather in law. There was a "a", "c" and "p".


The different apples cut up and mixed with the flour, sugar and nutmeg.


The pie before it was in the oven.

The pie once it came out of the oven. How delish does this look.

Homemade Pie Crust

I know I have not posted in awhile I have been very busy, so I going to post a couple of things tonight. Before I get into this post I wanted to thank everyone so much for your comments. I love to hear your suggestion, comments and stories. Keep them coming I love to read them all, so now to get back to my blog posts.

I branched out a little this weekend and decided to make an apple pie this. It was important to me to make sure I made my own pie crust. I think that it just adds a little more to the pie when you make your own pie crust. One thing that I want to do this summer is to make two different pie crusts one with butter and one with shorting and see which one tastes better.

This was an easy pie crust to make and turned out very well. The best part is you can make it and freeze the crust for up to a month. This made me happy, to think that I would be able to make this pie crust in October and freeze it so I would have it ready for the Thanksgiving holiday! If you have not noticed I am a planner.

This recipe uses butter; but like I said check back later to see if butter or shorting.

Ingredients
2 1/2 cups all-purpose flour
1 teaspoon salt
1 teaspoon sugar
2 sticks chilled unsalted butter, cut into pieces

Directions
To make the dough for the pie crust, mix 2 1/2 cups all-purpose flour and 1 teaspoon each salt and sugar in a medium-size bowl. Cut 2 sticks chilled unsalted butter into pieces. With a pastry blender, cut in butter, working until mixture resembles coarse meal.

Add 4 tablespoons ice water; work with hands until dough comes together. If dough is still crumbly, add more ice water a tablespoon at a time (up to 4 more tablespoons). Do not overwork.

Divide dough in half, and flatten halves into disks. Wrap disks separately in plastic; refrigerate at least 1 hour.

To form the pie shell, roll the dough on a floured surface into a 14-inch round. Wrap around rolling pin and carefully unroll over a 9-inch pie plate.

Fit gently into bottom and side of plate. Use kitchen shears to trim dough to a 1-inch overhang; fold under, and seal to form a rim.

Crimp rim with fingertips and knuckle. Repeat with remaining dough; wrap each with plastic, stack, and freeze


The crust once I was done mixing it up.


The finished pie crust. It make alot fo it was perfect for a whole pie.


Another look the pie curst, so delish!!

Thursday, June 2, 2011

Ciabatta Bread

I was home a couple of Fridays ago and with the extra time I had not having to commute I made some Ciabatta bread. It was delish and was great with some herbs and oil. The only problem that I am having when I make my own bread is trying to get it to keep. This made two HUGE loaves and there was no way my husband and I to eat it all. I wanted him to bring some of them to the neighbors but they were away because of the holiday weekend. Does anyone have any ideas? I always try to make breadcrumbs, croutons etc. but you can never seem to use it all.
This was great and delish. Below is the recipe try it out and let me know.

Ingredients
3 1/2 cups all-purpose flour
1 teaspoon white sugar
1 teaspoon salt
1 tablespoon active dry yeast
1 cup water
2 tablespoons vegetable oil
1 egg
3 tablespoons olive oil

Directions
1. Combine 1 cup flour, sugar, salt, and yeast. Mix well. Heat water and vegetable oil until warm, and add to yeast mixture along with the egg. Blend with an electric mixer at low speed until moistened. Beat for 2 additional minutes. Stir in 1 3/4 cup flour while beating, until dough pulls away from side of bowl.

2. Knead in 3/4 cup flour on floured surface. Cover dough with a bowl, and let sit for 5 minutes. Place dough on a greased baking sheet. Cover with greased plastic wrap and a cloth towel. Place in a warm place for 30 minutes.

3. Lightly flour or use parchment lined baking sheets. Divide into 2 pieces, and form each into a 3x14 inch oval. Place loaves on prepared sheets, dimple surface, and lightly flour. Cover, and let rise in a draft free place for approximately 45 minutes.

4. Preheat oven to 425 degrees F (220 degrees C).

5. Dimple dough for a second time, and then place loaves in the oven, positioned on the middle rack. Bake for 25 to 30 minutes. During baking, spritz loaves with water every 5 to 10 minutes for a crispier crust.


The dough before I put it in the oven.


The bread after I took it out and it was done. It was so crispy and good. Loved it.

Tuesday, May 31, 2011

Easy Homemade Pasta

There is nothing that I love more than pasta. If I could I would eat some form of it everyday, but we all know that is not good for our waist lines or for our health. I know I have written a lot about my grandfather in law and how he owned a bakery and some of the great items I have been lucky enough to receive. Well one of the best items was a pasta maker. I was pricing them out of my kitchen aid mixer and even the “used” ones were around 100 dollars. Not worth it to me.

So you can imagine my surprise when my husband pulled the pasta maker. I literally jumped for joy. I have made many different kind of pasta including regular, whole wheat, spinach and tomato. Some came out better than others. I will post all the recipes as soon as I perfect them a bit more.

I did include the recipe I used for the regular pasta, very simple and easy to do. How much do you love my pasta maker?! It takes some work but like I have said before I love stuff that has a story to it. And this one has the best story of all. Enjoy the pasta.

Ingredents
1 ¾ cups flour
2 eggs
3-4 tablespoons of water more or less depending on the consistency of the dough
I don’t add salt to my pasta, I just don’t see the need for the extra sodium. If you would like you can add ¼ teaspoon of salt.

Put the flour in a bowl and make a well and add the eggs and water. Beat the eggs and water in the well of flour. Once the eggs and water are mixed start to work the flour into the egg mixture. You can use a wooden spoon but I prefer my hands. Make sure the dough is not too sticky, if dough is too sticky sprinkle with flour so it is easy to work with.

Once dough is incorporated use your pasta machine to roll out the dough for the pasta. Once the pasta is done place them on a surface to dry. The pasta will last 3 months in an air thight container.


My old school pasta machine. Love, love, love it. I cant wait to make some gift baskets for the fall.


The well of flour that you put the eggs and water in.


Rolling our the pasta dough getting ready to cut it.


The pasta dough after it has been mixed.


The pasta drying on my counter.


The homemade pasta with pesto sauce. I will post the pesto sauce in a later post.


Thursday, May 12, 2011

Pastry Crust


I love the summer. I love the sun, heat and summer fruits. So I decided to make a strawberry tart. I made the crust from scratch and it was super easy to make. The dough was a little sticky so you are going to need a good amount of flour. Once you cook the crust it will shrink so make sure that you roll the dough out to cover the entire tart pan. This is a must try. See the recipe below.

One thing to keep in mind is the once you take the crust out of the oven the first time it will puff up. Let the crust cool and it will go back down to a normal size.


Ingredients
1 1/4 cups all-purpose flour
3 tablespoons sugar
1/2 teaspoon salt 6 tablespoons (3/4 stick) cold unsalted butter, diced
2 tablespoons cold shortening (recommended: Crisco)
1/4 cup ice water
2 cups Pastry Cream, recipe follows
2 pints whole strawberries, hulled and halved

Directions
Combine the flour, sugar, and salt in a small bowl and place in the freezer for 30 minutes. Put the flour mixture in the bowl of a fitted paddle. Add the butter and shortening and mix until the butter is in the size of peas. Add the ice water and mix until the dough comes together. Dump on a well-floured board and form into a disk. Wrap in plastic and chill for at least 30 minutes.
Meanwhile, preheat the oven to 375 degrees F.


Roll out the dough and fit into 4 (4 1/2-inch) tart pans with removable sides. Don't stretch the dough when placing it in the pans or it will shrink during baking. Cut off the excess by rolling the pin across the top of each pan. Line the tart shell with a piece of buttered aluminum foil, butter side down, and fill them with dried beans or rice. Bake for 10 minutes. Remove the beans and foil, prick the bottom of the shells all over with a fork, and bake for another 15 to 20 minutes until lightly browned. Set aside to cool.